/

October 2, 2024

Enhancing Wood Engraving with Borax: Techniques, Safety, and Alternatives

Introduction

Wood engraving has long been a cherished technique among craftsmen and hobbyists for its ability to create intricate and detailed artistic pieces. However, the quest for enhanced visual appeal and durability in wood engraving can sometimes be challenging, given the natural variations and limitations of wood as a material. One innovative solution that has been gaining attention is the use of borax—a common household chemical that not only improves the engraving process but also enhances the final appearance of the wood. In this blog post, we’ll dive deep into how borax can affect wood engraving, explore its benefits, and provide practical tips for using it effectively. Whether you’re a seasoned woodworker or a curious beginner, understanding the interaction between borax and wood will open up new possibilities for your engraving projects.


What is Borax and Why Use It in Wood Engraving?

Borax, chemically known as sodium borate, is a mineral and salt of boric acid. Commonly found in laundry and cleaning products, borax is celebrated not only for its cleaning prowess but also for a variety of other applications, including as a flux in metallurgy, an ingredient in cosmetics, and more intriguingly, in arts and crafts. In the context of wood engraving, borax serves a special purpose. It is used to treat the wood prior to engraving, enhancing both the durability of the material and the clarity of the engraved designs.

Why use borax in wood engraving? The reasons are manifold:

  • Color Enhancement: Borax has the ability to bring out rich, warm tones in the wood, making engraved designs more visually striking.
  • Improved Contrast: By altering the wood’s surface, borax treatment helps to create sharper, more distinct engraved lines.
  • Increased Durability: Treating wood with borax can help in hardening the surface, providing a slight increase in resistance to physical wear and tear.

Given these advantages, borax becomes an appealing choice for engravers looking to elevate the quality of their work and achieve consistent results across different types of wood. Next, we’ll explore how exactly borax enhances the wood engraving process.


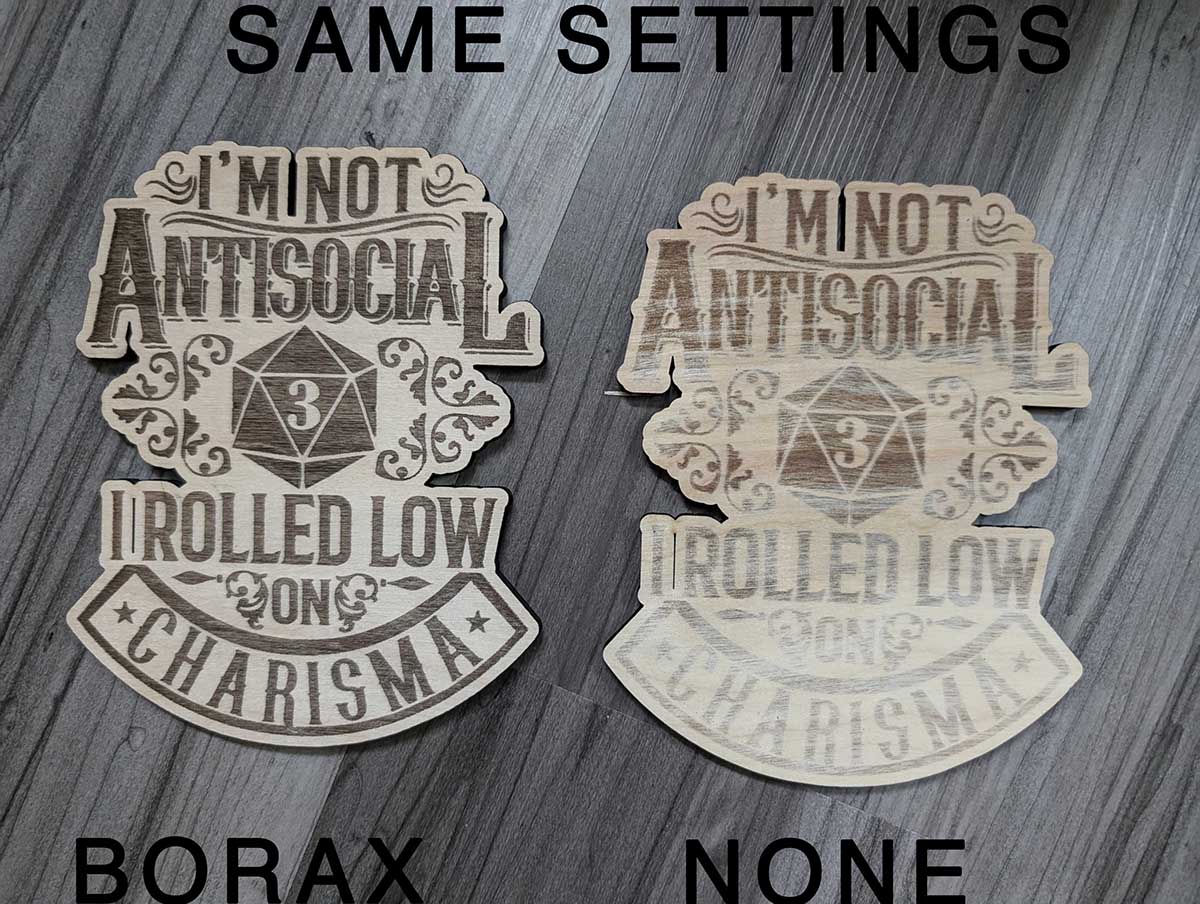
How Borax Enhances Wood Engraving

Understanding the specific enhancements borax brings to wood engraving requires a closer look at its chemical interaction with the wood fibers. When borax is applied to wood, it seeps into the porous surface, reacting chemically with the cellulose. This reaction not only affects the physical properties of the wood but also transforms its appearance.

Visual Improvements:
  • Color Deepening: Borax reacts with the wood to deepen its natural color, providing a rich, vibrant base that makes engraved details pop.
  • Contrast Enhancement: The chemical reaction helps to differentiate the engraved areas from the untreated areas, highlighting the intricate details of the design.
Durability Aspects:
  • Surface Hardening: The treatment process slightly hardens the surface of the wood, making it more resistant to scratches and environmental factors.
  • Moisture Resistance: Borax has natural antifungal properties, which can help in reducing the susceptibility of the wood to moisture and mold growth.

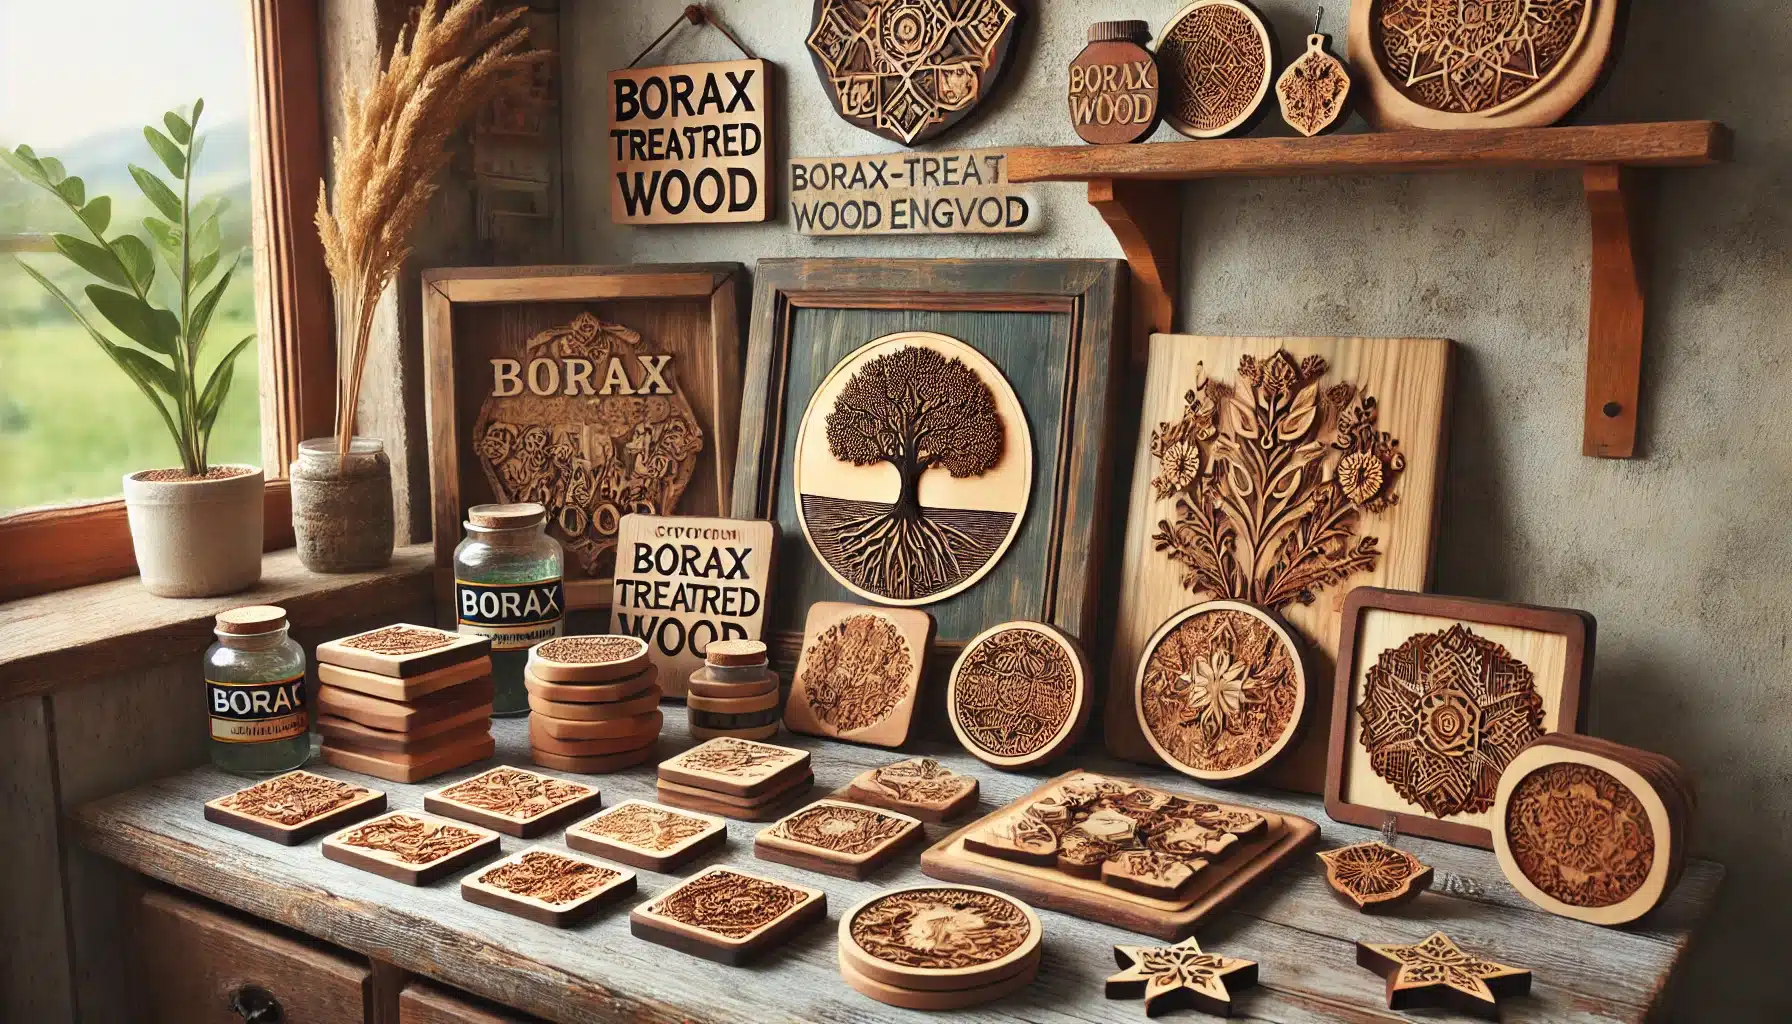
To illustrate these points, here are some before and after images of borax-treated wood pieces, showcasing the enhancement in color and contrast.

bf and aft

Tables Comparing Treated vs. Untreated Wood:

PropertyTreated with BoraxUntreated Wood
Color DepthEnhancedNatural
ContrastHighLow
Surface HardnessIncreasedStandard
Moisture ResistanceImprovedStandard

From the table, it’s clear that borax treatment can significantly improve the aesthetic and functional qualities of wood for engraving purposes.

Preparing Your Wood for Borax Treatment

Preparing Your Wood for Borax Treatment

Proper preparation of the wood is crucial for maximizing the benefits of borax treatment. Here’s a step-by-step guide to ensure that your wood is ready for engraving post-treatment.

Step 1: Selecting the Right Wood
  • Choose wood types that are known for their engraving quality such as basswood, birch, or maple. These species have a fine grain and consistent texture that respond well to borax.
Step 2: Sanding the Wood
  • Begin by sanding the wood surface with a lower grit sandpaper (around 120-grit) to remove any rough spots.
  • Progressively move to higher grits (up to 320-grit) to achieve a smooth finish. This step is essential as it ensures that the borax solution penetrates evenly.
Step 3: Cleaning the Surface
  • Once sanded, clean the wood surface with a damp cloth to remove any sawdust or debris. Allow the wood to dry completely before proceeding.
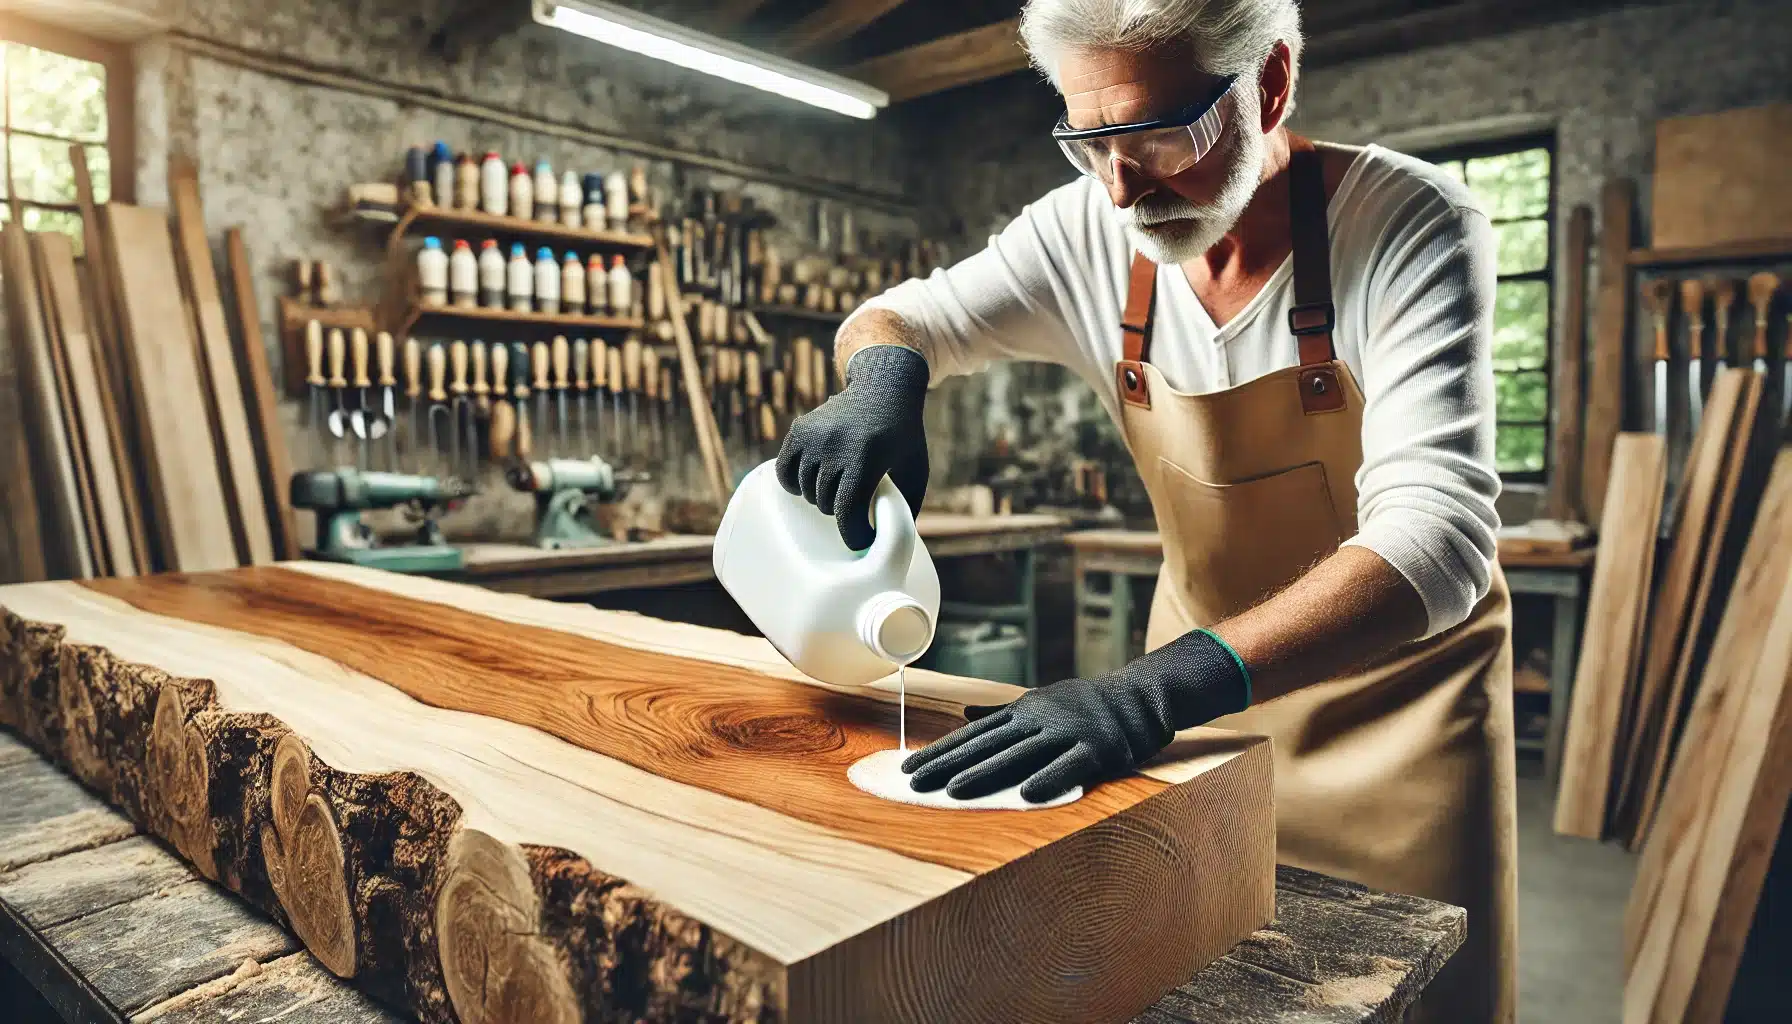
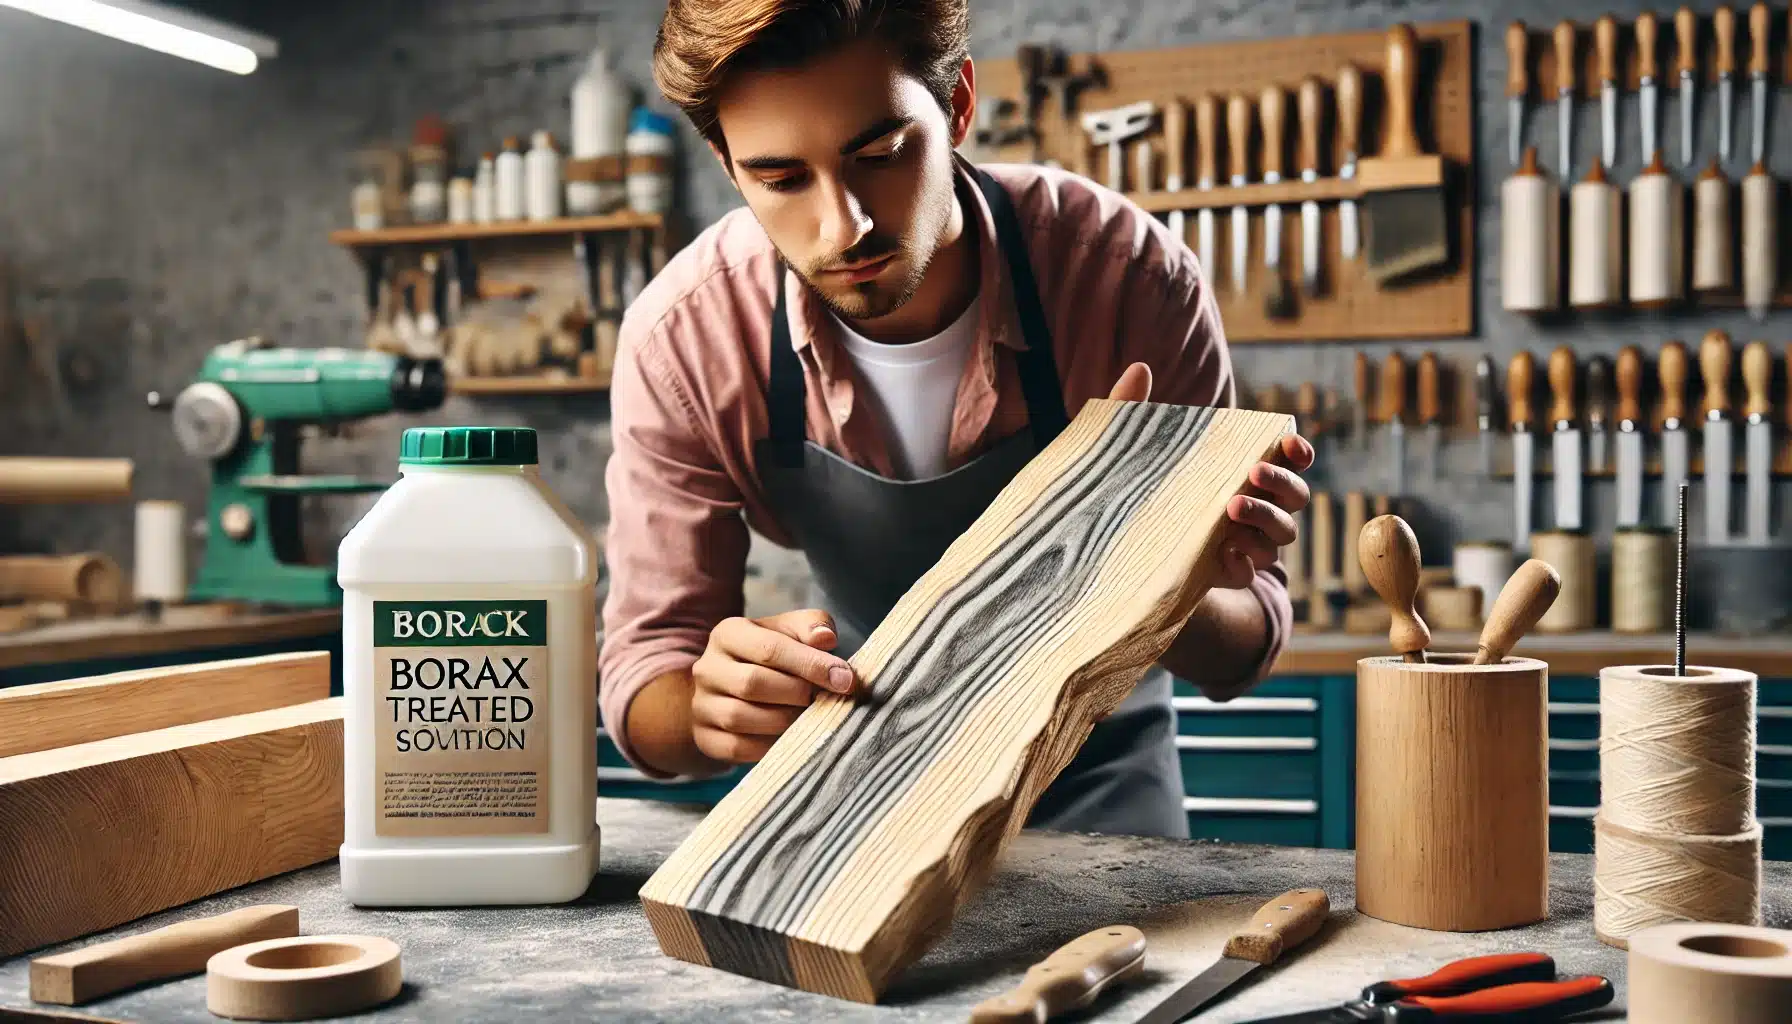
Step 4: Mixing the Borax Solution
  • In a container, mix borax powder with warm water. A general recommendation is to use a ratio of 1 part borax to 4 parts water.
  • Stir until the borax is completely dissolved.
Safety Precautions:
  • Wear gloves and safety goggles to protect your skin and eyes from the borax solution.
  • Ensure that your workspace is well-ventilated to avoid inhaling any dust or fumes.
Step 5: Applying the Borax Solution
  • Use a brush or sponge to apply the borax solution evenly across the wood surface. Be generous but avoid over-saturating the wood.
  • Allow the solution to soak into the wood for at least 30 minutes before wiping off any excess with a clean cloth.
Step 6: Drying and Curing
  • Let the wood dry overnight in a well-ventilated area. The borax needs time to set into the wood fibers and harden the surface.
Visual Guide:


By following these steps, your wood will be well-prepared for the engraving process, with an enhanced surface that’s primed for detailed work. Proper preparation not only optimizes the effects of borax but also contributes to the overall success of your engraving project.

Application Techniques for Borax on Wood

Applying borax to wood is a straightforward process, but achieving a uniform and effective treatment requires careful technique and attention to detail. Here’s how you can apply the borax solution to your prepared wood for the best engraving outcomes.

Step 1: Choosing the Right Application Tool
  • Depending on the size of the wood and the intricacy of the project, choose between a brush, sponge, or spray bottle for application. Brushes are ideal for detailed work, while sponges can be used for larger surfaces.
Step 2: Application Method
  • Brushing: Dip your brush into the borax solution and apply it evenly across the wood surface. Use long, even strokes to ensure coverage without over-saturation.
  • Spraying: If using a spray bottle, spray the solution evenly over the wood from a distance of about 6 inches. This method is effective for large pieces or for achieving a more diffuse effect.
  • Sponging: For a more controlled application on larger areas, a sponge can be used to dab the solution onto the wood, allowing for precise control of how much liquid is applied.
Step 3: Ensuring Even Coverage
  • After the initial application, go over the wood surface again to ensure that no areas have been missed. Pay particular attention to edges and corners, as these are often overlooked.
Step 4: Timing and Drying
  • Allow the borax solution to penetrate the wood for about 30 minutes. This time allows the solution to fully interact with the wood fibers.
  • Wipe off any excess solution with a clean, dry cloth. This step prevents the formation of salt residues on the wood surface.
Step 5: Curing the Wood
  • Leave the treated wood to dry in a well-ventilated area for at least 24 hours. The drying time can vary based on the wood type and environmental conditions.
  • Check the wood periodically to ensure that it is drying evenly and adjust the position if necessary to avoid warping.
Visual Demonstrations:
  • Providing a video tutorial or step-by-step images showing the application process can be highly beneficial for visual learners.
Tips for Achieving the Best Results:
  • Always test the borax solution on a small, inconspicuous area of the wood to check for any adverse reactions before applying it to the entire piece.
  • If the wood appears to be drying unevenly, you can lightly sand it after the drying process to smooth out any rough areas.

By mastering these application techniques, you can ensure that your wood is optimally prepared for engraving, with enhanced visual characteristics and improved durability. The uniform application of borax will help in achieving professional-level results in your engraving projects.


Engraving Process After Borax Application

Once the borax-treated wood has dried and cured, it’s ready for engraving. However, the alterations in wood properties due to borax treatment necessitate some adjustments to your usual engraving process. Here are the key steps and considerations to ensure optimal results.

Step 1: Adjusting Laser Settings
  • Power: Because borax can harden the surface of the wood, you may need to increase the power setting on your laser engraver slightly to achieve the same depth of cut as with untreated wood.
  • Speed: Adjust the speed of the laser to compensate for the higher power setting. Slower speeds can result in darker burns, which might be desirable depending on the design.
Step 2: Testing on Sample Material
  • Before you begin the final project, test your adjusted settings on a scrap piece of borax-treated wood. This will help you fine-tune the laser settings without risking your main piece.
Step 3: Continuous Monitoring
  • During the engraving process, continuously monitor the progress. Borax-treated wood might react differently under the laser, sometimes burning more quickly or unevenly.
  • Be prepared to make real-time adjustments to power or speed to adapt to how the wood is reacting.
Step 4: Post-Engraving Finishing
  • Once engraving is complete, you may notice that the engraved areas are sharper and more defined. This is a positive effect of the borax, which enhances the contrast between treated and burned areas.
  • Clean the surface gently with a soft brush to remove any loose char or debris from the engraving process. For deeper cleans, a slightly damp cloth can be used, but ensure the wood dries completely afterward.
Practical Insights:
  • Contrast and Clarity: One of the most notable effects of borax is the enhanced contrast it provides. Engraved lines appear more vivid, making detailed designs stand out more prominently.
  • Handling Variations: Not all wood types react the same way to borax treatment. Experimentation with different wood species and borax concentrations may be necessary to achieve consistent results across various projects.
Case Study:
  • A woodcraft artist reported significant improvements in the detail and durability of their engravings on borax-treated maple wood. They noted that the designs were not only more visually striking but also more resistant to fading and wear over time.
Additional Tips:
  • Always ensure your work area is well-ventilated, especially when working with chemically treated wood.
  • Consider wearing a dust mask to avoid inhaling any particles or fumes generated during the engraving process.

By understanding and adapting to the changes borax treatment brings to wood, you can enhance both the aesthetic quality and longevity of your engraved projects. The precise, vivid results achievable with borax-treated wood can significantly elevate the quality of your craftsmanship.


Creative Projects Using Borax in Wood Engraving

A creative display

Borax-treated wood opens up a wealth of creative possibilities for wood engraving projects. The enhanced color and durability allow for more intricate and enduring designs. Here are some inspiring project ideas that leverage the unique properties of borax-treated wood:

1. Personalized Wooden Jewelry
  • Project Idea: Create custom pendants and earrings with deeply engraved designs. The borax treatment enhances the wood’s natural color, making these small pieces stand out.
  • Materials Needed: Small wood blanks (preferably maple or birch), borax solution, laser engraver.
  • Steps: Treat the wood with borax, let it dry, then use a laser to engrave personalized designs or initials.
2. Decorative Wall Art
  • Project Idea: Use larger wood panels to create striking wall decorations. Borax can bring out the wood’s natural grain, adding depth to landscape scenes or abstract patterns.
  • Materials Needed: Large wood panels, borax solution, laser engraver, hanging hardware.
  • Steps: Apply borax to enhance the wood panel’s natural textures, then engrave with detailed scenery or artistic designs.
3. Customized Coasters
  • Project Idea: Produce sets of coasters with intricate designs or quotes. The enhanced contrast from borax treatment makes these everyday items unique and gift-worthy.
  • Materials Needed: Square or round wood blanks, borax solution, laser engraver, protective sealant.
  • Steps: Treat coaster blanks with borax, engrave with custom designs, and apply a sealant to protect against moisture and wear.
4. Engraved Wooden Signs
  • Project Idea: Craft personalized signs for homes or businesses. Borax treatment provides a durable and visually appealing base that highlights the engraved text or logos.
  • Materials Needed: Wood planks, borax solution, laser engraver, mounting hardware.
  • Steps: Prepare the wood with borax, engrave names, addresses, or business logos, and finish with a weather-resistant coating for outdoor use.
5. Intricate Book Covers
  • Project Idea: Design and create custom book covers with detailed engravings. The sharpness and clarity enhanced by borax make fine text and decorative borders pop.
  • Materials Needed: Thin wood sheets, borax solution, laser engraver, binding materials.
  • Steps: Treat the wood sheets with borax, engrave detailed designs or titles, and assemble into book covers.
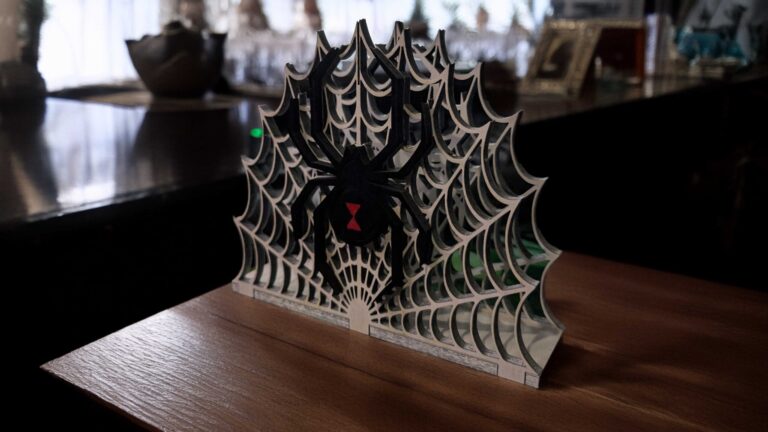
Visual Examples:
  • Include photos or a gallery of finished projects that show the versatility and beauty of borax-treated engravings.
Creative Tips:
  • Experiment with Different Depths: Adjust your laser settings to vary the depth of engraving, which can create dynamic visual effects on borax-treated wood.
  • Mix Media: Combine borax-treated wood with other materials like metal or glass to create multi-textured pieces that highlight the engraved wood’s unique properties.

These project ideas not only showcase the practical applications of borax in wood engraving but also inspire creativity and innovation in your own work. Whether you’re making items for sale, gifts, or personal use, borax can elevate the aesthetic and durability of your engraved wood creations.


Troubleshooting Common Issues with Borax-Treated Wood Engraving

troubleshooting a piece of borax-treated

Even with the best preparations, working with borax-treated wood can sometimes present challenges. Here are some common issues that may arise and tips on how to address them effectively:

1. Uneven Coloration
  • Issue: The wood may show patches of uneven color after applying borax, especially if the application wasn’t uniform.
  • Solution: Ensure that the borax solution is evenly applied over the wood surface. A second application in lighter areas can help even out the tone. Sanding lightly after the borax treatment but before engraving can also help achieve a more uniform appearance.
2. Wood Warp or Damage Post-Treatment
  • Issue: Wood treated with borax might warp or split, particularly if it absorbs too much solution or dries too quickly.
  • Solution: Apply a lighter coat of borax solution, or use a diluter mixture to minimize wood saturation. Dry the wood slowly in a controlled environment to prevent warping. Placing weights on flat surfaces during drying can also help maintain shape.
3. Residue on Engraved Areas
  • Issue: White residue can sometimes form on the engraved areas, particularly if there was an excess of borax.
  • Solution: Wipe the wood with a slightly damp cloth after engraving to remove any residue. Ensure the wood is completely dry before applying any finishes.
4. Difficulty in Engraving
  • Issue: Borax can harden the wood surface, which might make it difficult for the laser to cut through effectively.
  • Solution: Increase the power of the laser slightly and reduce the speed to allow for deeper cuts. Always conduct a test run on a scrap piece to adjust the settings without risking the main project.
5. Safety Concerns During Engraving
  • Issue: Engraving borax-treated wood can release fumes that may be irritating or harmful.
  • Solution: Ensure your workspace is well-ventilated. Consider using a fume extractor or wearing a mask designed to filter out fine particulate matter and fumes.
Case Study:
  • A craftsperson experienced significant issues with uneven coloration and found that pre-treating the wood with a light sanding session before applying borax helped create a more consistent base for the treatment. Their project outcomes improved noticeably after implementing this step.
Additional Tips:
  • Regular Maintenance: Keep your laser engraver clean and well-maintained. Residue from borax can build up on the machine, affecting its performance.
  • Documentation: Keep a record of borax concentrations, application methods, and drying times for each type of wood you work with. This documentation can be invaluable for troubleshooting and refining your process.

By understanding these common issues and knowing how to troubleshoot them, you can improve your results with borax-treated wood and ensure a smoother, more reliable engraving process.


Safety Considerations When Using Borax

While borax is a useful tool in enhancing wood engraving, it’s important to handle it with care to ensure your safety and the environment’s protection. Here are key safety considerations and best practices for using borax in your projects:

1. Health Precautions
  • Skin and Eye Protection: Borax can be irritating to the skin and eyes. Always wear gloves when handling borax powder or solutions and consider using safety goggles, especially during the application process.
  • Respiratory Protection: Although borax is not highly toxic, it can be irritating to the respiratory tract if inhaled as dust. Use a mask or respirator in dusty environments or when mixing large quantities of borax solution.
2. Environmental Considerations
  • Proper Disposal: Do not dispose of borax solution down household drains as it can contribute to environmental pollution. Check with local waste management services for guidelines on disposing of chemicals safely.
  • Sustainability Practices: Use borax judiciously and only when necessary to minimize environmental impact. Consider alternative natural methods for enhancing wood if sustainability is a core concern in your practice.
3. Legal and Safety Regulations
  • Compliance with Regulations: Ensure that you are aware of and comply with local and national regulations regarding the use of borax, especially in commercial settings.
  • Storage and Handling: Store borax in a secure, dry place away from children and pets. Label all containers clearly and include safety information.
4. Safe Application Tips
  • Controlled Application: Apply borax solution in a well-ventilated area, preferably outdoors or in a workspace with good airflow. This minimizes the risk of inhaling fumes or dust.
  • Accurate Mixing: Follow recommended ratios for mixing borax with water to avoid creating overly concentrated solutions that could be more hazardous.

5. First Aid Measures

  • Skin Contact: If borax gets on your skin, wash the area thoroughly with soap and water.
  • Eye Contact: In case of eye contact, rinse your eyes with plenty of water for at least 15 minutes and seek medical advice if irritation persists.
  • Ingestion: If ingested, do not induce vomiting. Drink plenty of water and seek medical attention immediately.
Important Reminders:
  • Borax is labeled as a mild skin irritant and should be treated with respect to prevent potential health risks.
  • Regularly review safety data sheets (SDS) for borax to stay informed about its properties and risks.

By adhering to these safety considerations, you can safely incorporate borax into your wood engraving projects while protecting yourself, others, and the environment. Always prioritize safety and health, especially when working with chemical substances.


Alternatives to Borax for Wood Engraving

While borax is effective for enhancing the appearance and durability of wood engravings, some might seek alternatives due to safety concerns, environmental considerations, or simply a preference for natural methods. Here are some viable alternatives to borax that can achieve similar effects in wood engraving projects:

1. Beeswax and Oil Mixtures
  • Description: A blend of natural beeswax and oils (such as linseed or tung oil) can protect and enhance wood without the use of chemicals.
  • Benefits: Provides a water-resistant finish, enhances the natural color of the wood, and is safe for use in home environments.
  • Application: Apply with a cloth or brush and allow to soak into the wood before buffing out the excess.
2. Shellac
  • Description: Shellac is a natural resin secreted by the lac bug. It can be used as a sealer to enhance the contrast and depth of wood engravings.
  • Benefits: Non-toxic and easy to apply, shellac brings out a rich, warm color in the wood and dries to a hard, durable finish.
  • Application: Brush on dissolved shellac flakes in alcohol, allowing each layer to dry before adding another for more depth.
3. Heat Treatment
  • Description: Applying heat to wood can darken its color and harden its surface, similar to some effects achieved with borax.
  • Benefits: Completely natural and requires no chemical additives. Heat treatment can also make the wood more resistant to moisture and decay.
  • Application: Use a heat gun or torch to evenly apply heat to the wood surface until the desired coloration is achieved.
4. Vinegar and Iron Oxide Solution
  • Description: A solution of vinegar steeped with steel wool (iron oxide) can be applied to wood to darken it, enhancing engraved areas.
  • Benefits: All-natural and inexpensive, this method reacts with the tannins in the wood to create a dark, aged appearance.
  • Application: Brush the solution onto the wood and let it react for a few hours before drying.
5. Commercial Wood Stains and Finishes
  • Description: There are many commercial products available that can enhance the contrast and durability of wood engravings.
  • Benefits: Wide variety of colors and finishes available, consistent results, and often include additional protective qualities.
  • Application: Follow manufacturer instructions for application, typically involving brushing or wiping on and allowing to dry.

Comparison Table:

MethodBenefitsConsiderations
Beeswax and OilsNatural, enhances colorMay require reapplication
ShellacNon-toxic, durable finishLimited color change
Heat TreatmentNo additives, hardens woodRequires careful temperature control
Vinegar and IronInexpensive, naturalColor dependent on wood tannins
Commercial StainsConsistent, durableChemical content varies

Case Study:

  • A woodworking studio tested various finishes on laser-engraved cedar. They found that while borax offered the most dramatic enhancement for color and contrast, beeswax and oils provided a satisfactory natural alternative that was easier and safer for their workshop environment.

These alternatives to borax offer a range of benefits and can be selected based on the specific needs of your project and personal or environmental concerns. Experimenting with different methods can help you find the best fit for enhancing your wood engraving projects.