Introduction
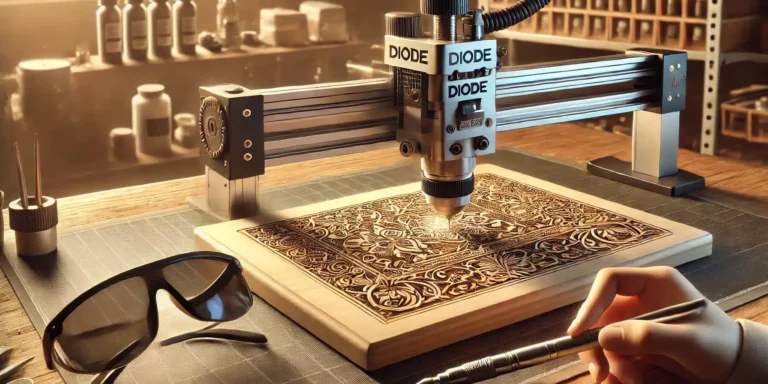
Laser cutting is a precise and versatile technology that’s become indispensable in various fields such as manufacturing, design, and even in DIY projects. The ability to cut intricate designs into different materials has opened up endless possibilities for creators and businesses alike. Central to preparing these detailed designs is Adobe Illustrator, a powerful vector graphics editing software. This guide is designed to teach you how to use Adobe Illustrator for laser cutting, ensuring your projects turn out perfectly every time.
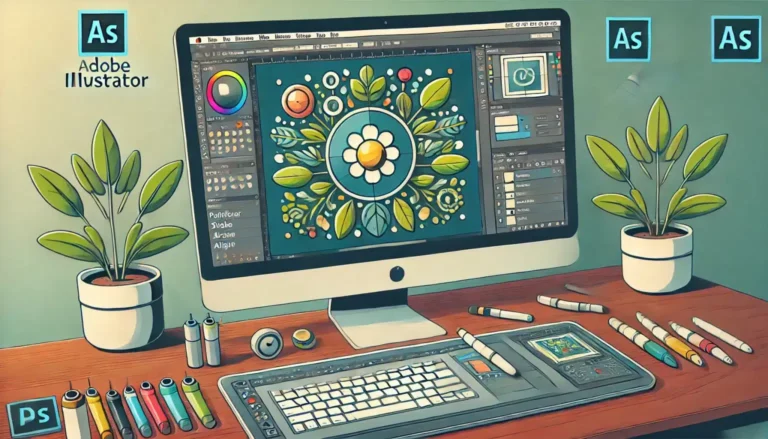
Adobe Illustrator is preferred for laser cutting due to its robust features that support vector graphic manipulations — essential for the precise cuts needed in laser engraving. This article will walk you through the initial setup of Adobe Illustrator for laser cutting tasks, share tips on preparing your designs, and help troubleshoot common issues. Whether you’re a seasoned designer or a novice eager to dive into the world of laser cutting, this guide will equip you with the necessary skills to use Adobe Illustrator effectively for your projects.
Let’s start by setting up our workspace and ensuring our tools are properly aligned for laser cutting tasks.
Getting Started with Adobe Illustrator for Laser Cutting
Setting up Adobe Illustrator for laser cutting begins with ensuring that you have the right environment and settings to efficiently handle your designs. This section will guide you through preparing your Illustrator workspace, tailored specifically for laser cutting tasks.
Workspace Setup:
- Version Check: Ensure you have the latest version of Adobe Illustrator installed. This ensures compatibility with the latest laser cutting software and hardware.
- Create a Dedicated Workspace: Illustrator allows users to customize and save workspace layouts. Set up a workspace that prominently features the tools you’ll use most frequently for laser cutting, such as the Pathfinder, Stroke, and Align panels. Go to
Window > Workspace > New Workspaceand name it “Laser Cutting.” - Units and Rulers: Set your document’s units to match the precision required for your laser cutter. Typically, millimeters are used for precision cutting. Adjust this by going to
Edit > Preferences > Unitsand selecting millimeters for General, Stroke, and Type.
Document Setup:
- New Document: Start by creating a new document tailored for laser cutting. Select
File > Newand set the width and height according to the maximum work area of your laser cutter. - Color Mode: Set your document color mode to RGB, as many laser cutters interpret RGB colors to assign different laser operations like cutting and engraving. This setting is found under
File > Document Color Mode > RGB.
Guides and Grids:
- Utilize Illustrator’s guides and grids to align your designs precisely. This is crucial for parts that need to fit together post-cutting. Enable snapping to ensure your design components align perfectly with the grid by checking
View > Snap to Grid.
Template Creation:
- For repetitive projects, save your document settings as a template. After setting up your document, save it as a template by choosing
File > Save As Template. This allows you to maintain consistency across similar projects without needing to reconfigure settings each time.
By setting up your Adobe Illustrator environment specifically for laser cutting, you reduce the risk of errors and increase the efficiency of your design process. Once your workspace is optimized, you’re ready to start designing.
Preparing Your Design
Once your workspace is configured, the next crucial step is preparing your design in Adobe Illustrator for laser cutting. This involves understanding vector graphics, optimizing your design for cutting, and avoiding common pitfalls that can affect the quality and precision of your cuts.
Understanding Vector Graphics:
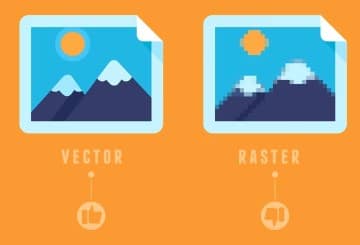
- Vector vs. Raster: Unlike raster images, which are made up of pixels, vector graphics consist of paths defined by a start and end point, along with other points, curves, and angles in between. For laser cutting, vectors are essential because they allow for precise path following by the laser cutter.
- Creating Vectors: Use tools like the Pen Tool (
P), Shape Tools (U), and the Line Segment Tool (\) to create clean, scalable vector designs suitable for cutting. Ensure all designs are closed paths, as open paths can lead to incomplete cuts.
Optimizing Design for Cutting:
- Simplify Your Design: Simplifying your vector paths can reduce cutting time and minimize errors. Use the
Simplifyoption (Object > Path > Simplify) to reduce the number of anchor points without significantly altering the appearance of your design. - Avoid Overlapping Paths: Overlapping paths can cause the laser cutter to double-cut areas, leading to burnt edges or weakened materials. Use the Pathfinder tool (
Window > Pathfinder) to merge overlapping paths and clean up your design.
Common Mistakes to Avoid:
- Too Much Detail: While intricate designs are possible with laser cutting, extremely small details may not translate well when cut, especially on more fragile materials. Keep minimum cut widths and material constraints in mind while designing.
- Ignoring Material Properties: Different materials react differently under the laser. Adjust your design accordingly, considering factors like kerf (the amount of material removed by the laser cut), which can affect how tightly pieces fit together.
Preparing Artwork for Cutting:
- Strokes to Paths: Ensure that all strokes are converted to paths before sending to a laser cutter. This can be done by selecting your strokes and choosing
Object > Path > Outline Stroke. This ensures the laser cutter recognizes them as cut lines. - Layer Organization: Organize your design into layers based on the cutting sequence. For instance, engraving layers should be separate from cut layers. This organization helps in setting up the laser cutter software accurately.
By following these guidelines, you prepare your design not only to look good on screen but also to be perfectly executable by a laser cutter. This preparation is key to translating your creative ideas into precise and clean laser cut pieces.
Working with Paths and Strokes
In Adobe Illustrator, the distinction between paths and strokes is crucial, especially when preparing designs for laser cutting. Understanding how to manipulate these elements effectively can greatly enhance the accuracy and quality of your cuts. This section delves into the specifics of paths, strokes, and their optimization for laser cutting applications.
Defining Paths:
- What are Paths? Paths in Illustrator are made up of one or more straight or curved segments. Each path is defined by anchor points, which can be moved, added, or deleted to change the shape of the path.
- Closed vs. Open Paths: For laser cutting, ensure all paths are closed. A closed path means the start point and end point are the same, creating a complete shape. Open paths may result in incomplete cuts.
Adjusting Stroke Weight:
- Setting the Correct Stroke Weight: In laser cutting, the stroke weight should be set to the smallest line width that your laser cutter can reliably cut, often 0.001 inches (0.0254 mm) or 0.1 mm. This setting tells the laser cutter that the path is a cut line rather than an area to be rastered.
- Conversion to Outlines: Once your design is finalized, convert all strokes to outlines. This can be done by selecting the stroke and choosing
Object > Path > Outline Stroke. This conversion transforms the stroke into a filled shape, ensuring it is recognized correctly by the laser cutter software.
Converting Strokes to Paths:
- Why Convert? Converting strokes to paths is critical because it turns the line into a shape that can be filled or used as a boundary for cutting. It solidifies the design in a way that is optimal for the laser’s interpretation.
- How to Convert: To convert a stroke to a path, select the stroke and use the
Outline Strokecommand underObject > Path. This makes the stroke a vector shape, which can be further edited as a path.
Best Practices for Path and Stroke Management:
- Keep Paths Clean: Avoid unnecessary complexity by minimizing the number of anchor points. Use the
Simplifytool (Object > Path > Simplify) to reduce points without significantly altering the shape. - Preview Your Paths: Regularly use the
Outline View(View > Outline) to see your design as the laser cutter might interpret it, ensuring all paths are correctly configured and there are no hidden errors.
By mastering these techniques, you can ensure that your designs are not only aesthetically pleasing but also perfectly set up for the precision required in laser cutting. Proper path and stroke management can significantly impact the quality of the final cut, highlighting the importance of these steps in the preparation process.
Color Coding for Laser Operations
Color coding in Adobe Illustrator is an effective strategy to manage and organize different laser operations such as cutting, engraving, and scoring. This method utilizes the RGB color mode to assign specific colors to different actions, which can be interpreted by the laser cutter’s software. This section explains how to set up and use color coding in your designs for optimal laser cutting efficiency.
Setting Up Swatches for Laser Operations:
- Creating Custom Swatches: Begin by setting up a custom swatch panel in Illustrator specifically for laser cutting. Go to
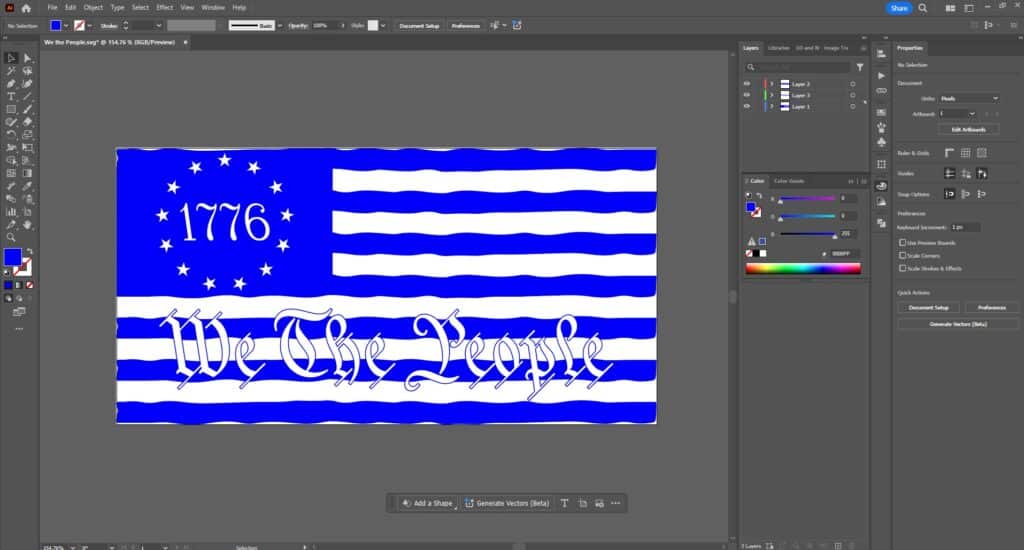
Window > Swatchesto open the Swatches panel, then create new swatches for each operation. Common color assignments are: red for cutting, blue for engraving, and green for scoring. Set these colors with RGB values for consistency. - Consistency Across Projects: Using the same color coding for all your projects can help streamline the workflow and reduce errors when setting up the laser cutter. It also makes it easier to understand and edit old projects or share files with others.
Practical Examples of Color Coding in a Design:
- Cutting (Red): Assign a pure red color (RGB: 255, 0, 0) to the paths that need to be fully cut through the material. This is typically used for the outer edges of your design or any internal cutouts.
- Engraving (Blue): Use a pure blue (RGB: 0, 0, 255) for areas that require engraving. Engraving is less intense than cutting and is used for decorative details within the material.
- Scoring (Green): Apply a green color (RGB: 0, 255, 0) to lines that only need a shallow cut or score. This is often used for folding lines or for subtle decorative accents that do not go all the way through the material.
Implementing Color Codes in Your Workflow:
- Layer Management: Organize your Illustrator file by layers, assigning each layer to a different laser operation based on the color. This not only keeps your file organized but also ensures that the laser cutter performs each operation in the correct order.
- Software Configuration: When setting up your design in the laser cutter’s software, configure the settings to recognize different colors as different operations. This usually involves assigning power settings and speed to each color, which controls how the laser interacts with the material.
Benefits of Using Color Coding:
- Increased Precision: By differentiating operations through color, you can visually inspect and ensure that all parts of your design are prepared correctly before sending them to the cutter.
- Efficiency in Production: Color coding speeds up the setup process on the laser cutter, as each color’s settings can be pre-configured, reducing the time needed for manual adjustments.
By effectively using color coding in your Adobe Illustrator designs, you can streamline the preparation and execution of your laser cutting projects. This approach minimizes errors and optimizes the overall cutting process, ensuring high-quality results.
Preparing the File for the Laser Cutter
After designing and color coding your artwork in Adobe Illustrator, the next crucial step is to prepare and save the file correctly for the laser cutter. This ensures that your design is accurately interpreted by the laser cutting machine, leading to precise cuts and successful projects. Here, we’ll cover the best practices for file preparation, including format selection and final checks.
Overview of File Formats Supported by Laser Cutters:
- Common File Formats: The most widely accepted file formats for laser cutting are SVG (Scalable Vector Graphics) and DXF (Drawing Exchange Format). Both formats retain the vector data and are compatible with most laser cutting software.
- Choosing the Right Format: SVG is preferred for its ease of use and support in web applications, while DXF is often used for its compatibility with more industrial or older machines. Check with your laser cutter’s specifications to choose the appropriate format.
Saving Your Illustrator File for Laser Cutting:
- Exporting the File: From Adobe Illustrator, go to
File > Export > Export As...and choose either SVG or DXF format. Ensure that you tick the ‘Use Artboards’ box if you want to export the entire workspace or select specific artboards only. - Optimizing the Export Settings: When exporting as SVG, ensure that ‘Responsive’ is unchecked to maintain the dimensions. For DXF files, check the options that correspond to your cutter’s requirements, often concerning text and curve accuracy.
Double-Checking Vector Paths and Node Points:
- Inspecting Paths: Before exporting, inspect all paths in the
Outline View(View > Outline) to ensure there are no hidden errors or stray points. This mode provides a clearer view of what the laser cutter will interpret. - Simplifying Complex Paths: If your design has very complex paths, consider simplifying them to reduce cut time and potential errors. Use the
Simplifytool (Object > Path > Simplify) and adjust the curve precision to retain the design’s integrity while making it easier for the machine to process.
Final Design Check:
- Proofreading Your Design: Review your design for any potential issues that could affect the cutting process, such as overlapping paths, unnecessary points, or areas too intricate to cut.
- Test Cut: If possible, perform a test cut on a small section of your design on the actual material. This can help catch any last-minute issues and ensure your settings are correctly adjusted for the material and design complexity.
By following these steps, your Adobe Illustrator file will be well-prepared for the laser cutting process. This preparation not only saves time during the cutting phase but also ensures that the final product meets your expectations in terms of quality and precision.
Tips for Efficient Laser Cutting
Once your design is ready and your file is prepared for the laser cutter, optimizing your Illustrator settings for efficient laser cutting can save time and enhance the quality of your projects. Here are some essential tips to fine-tune your setup and ensure smooth operations during the laser cutting process.
Optimizing Illustrator Settings:
- Reduce Nodes: Excessive nodes on your paths can slow down the laser cutter and cause unnecessary complexity in cuts. Use the
Simplifytool (Object > Path > Simplify) in Illustrator to reduce the number of nodes without losing the integrity of your design. Aim for the minimal number of nodes that still preserve the desired shape. - Align and Distribute: Proper alignment and distribution of elements in your design ensure that the laser moves efficiently over the material. Use the
Alignpanel (Window > Align) to ensure all components are perfectly positioned relative to each other.
Material Testing and Adjustments:
- Material-Specific Settings: Different materials require different laser settings (power, speed, and frequency). Create a library of presets in your laser cutter’s software for materials you frequently use, based on testing each material for the best results.
- Test Cuts: Before committing to the full design, perform test cuts on small pieces of the material. Adjust power and speed settings based on the test results to find the optimal balance for clean cuts and minimal burning.
Maintaining Digital Files for Efficiency:
- Version Control: Keep versions of your files with settings adjusted for different materials or different laser cutters. This practice saves time when switching between projects or materials, as you won’t need to redo settings each time.
- Backup and Cloud Storage: Use cloud storage solutions to keep backups of all your laser cutting files. This ensures you can access them from any machine and have a backup in case of hardware failures.
Using Scripts and Actions:
- Automate Repetitive Tasks: If you find yourself repeatedly performing the same actions in Illustrator, consider creating scripts or using the
Actionspanel to automate these tasks. This can significantly speed up your preparation process, especially for complex or multi-part designs.
Efficiency in the Workspace:
- Workspace Layout: Organize your Illustrator workspace to prioritize tools and panels you use most frequently for laser cutting. This customization reduces the time spent navigating menus and increases your overall efficiency.
By implementing these efficiency tips, you can streamline your laser cutting process, reducing both the time and the potential for errors. This careful preparation and optimization in Adobe Illustrator ensure that your projects are not only creative but also technically successful.
Troubleshooting Common Issues
When working with Adobe Illustrator for laser cutting, you may encounter several common issues that can affect the quality and accuracy of your projects. Understanding how to troubleshoot these problems is essential for ensuring smooth operations and excellent results. This section covers common errors and their solutions, along with tips for adjusting settings for different materials.
Common Errors When Exporting Files:
- Path Issues: Sometimes, paths may not export correctly, leading to incomplete or incorrect cuts. Ensure all paths are closed, and strokes are converted to paths before exporting. Recheck the file in Outline Mode (
View > Outline) to spot any anomalies. - File Compatibility: Compatibility issues can arise when the file format is not fully supported by the laser cutter’s software. Always double-check which file formats your laser cutter supports best, typically SVG or DXF, and test the exported file before the actual cutting.
Adjusting Settings for Different Materials:
- Material-Specific Considerations: Each material has unique properties that require adjustments in the laser settings:
- Wood: Requires lower speed and higher power to cut through but watch for charring at too high power.
- Acrylic: Needs a higher speed to achieve a polished edge. Too slow can lead to melted edges.
- Paper and Cardboard: Very high speed and very low power are necessary to prevent burning.
- Test and Adjust: Conduct small test cuts on the material to fine-tune the speed, power, and frequency settings. This helps avoid waste and ensures the settings are perfect before proceeding with the full design.
Recalibrating Your Design:
- When to Recalibrate: If your test cuts show inconsistencies or the material is not reacting as expected, recalibration of your design and laser settings might be necessary.
- Steps for Recalibration: Adjust the vector paths for kerf (the laser’s cut width), especially important when designing interlocking pieces or assemblies. Increase or decrease path offsets slightly in Illustrator to compensate for the material’s reaction to the laser.
Ensuring Software and Firmware Updates:
- Regular Updates: Keep both Adobe Illustrator and your laser cutter’s software updated to the latest versions. Software updates often fix bugs that could be causing issues with file compatibility or cutting accuracy.
- Firmware Checks: For the laser cutter itself, ensure that its firmware is up-to-date, as manufacturers often release updates to improve performance or resolve known issues.
By understanding and applying these troubleshooting tips, you can significantly reduce downtime and improve the quality of your laser-cut projects. Regular maintenance of both your digital files and the laser cutter itself will help you achieve the best results consistently.
Enhancing Your Skills
After mastering the basic techniques of using Adobe Illustrator for laser cutting, enhancing your skills with advanced tools and resources can help you take your projects to the next level. This section provides tips on further developing your Illustrator prowess and where to find additional learning resources to deepen your knowledge and expertise.
Advanced Illustrator Techniques:
- Mastering Bezier Curves: Gain precision in your designs by mastering Bezier curves, which can help create more complex and smoothly curved paths. Utilize the
Pen Toolfor meticulous control over anchor points and curve handles. - Using the Pathfinder Tool: The Pathfinder tool is invaluable for creating complex shapes by combining multiple simple shapes. Experiment with different Pathfinder operations like Unite, Subtract, Intersect, and Exclude to refine your designs.
- Clipping Masks and Compound Paths: Learn to use clipping masks and compound paths for creating layered and intricate designs. These tools are especially useful for preparing complex engravings or multi-layered cuts.
Continuing Education and Resources:
- Online Courses and Tutorials: Websites like Udemy, Coursera, and LinkedIn Learning offer courses on Adobe Illustrator that focus on different aspects of graphic design, including specific courses aimed at using Illustrator for laser cutting.
- Community Forums and Social Media: Engage with communities on platforms like Reddit, dedicated Adobe forums, or Facebook groups where laser cutting enthusiasts share tips, troubleshooting advice, and design ideas.
- Workshops and Webinars: Keep an eye out for workshops and webinars hosted by makerspaces, universities, or companies specializing in laser cutting. These events are great opportunities to learn from experienced professionals and see new technologies in action.
Inspirational Case Studies:
- Study Successful Projects: Look at case studies of successful laser cutting projects that utilized Adobe Illustrator. Many designers and companies share their processes and final outcomes, which can provide insights and inspiration for your own work.
- Experiment with Different Materials: Don’t limit yourself to traditional materials. Try cutting different substrates like leather, fabrics, or even coated metals to expand your portfolio and skills.
Maintaining a Portfolio:
- Document Your Work: Keep a detailed portfolio of your designs, including notes on the settings used for different materials and machines. This portfolio can be a valuable reference for future projects and also serve as a showcase of your skills for potential clients or employers.
By continually enhancing your skills and staying engaged with the laser cutting community, you can keep your work innovative and maintain a competitive edge in your craft. Adobe Illustrator is a powerful tool, and mastering its full potential will open up even more possibilities for your laser cutting projects.
Conclusion
Congratulations on completing this comprehensive guide on using Adobe Illustrator for laser cutting! You’ve learned how to set up your Illustrator workspace, prepare and optimize your designs, and troubleshoot common issues. Additionally, you’ve gained insights into advanced techniques and resources that can help you continue to grow and refine your laser cutting skills.
Recap of Key Points:
- Workspace and File Preparation: Setting up a dedicated workspace and preparing your files correctly are foundational steps that ensure accuracy and efficiency in your laser cutting projects.
- Design Optimization: Utilizing tools like color coding and proper path management helps streamline the laser cutting process and reduces the potential for errors.
- Troubleshooting and Enhancements: Being proactive in troubleshooting and continually enhancing your skills are crucial for maintaining high-quality results and expanding your capabilities.
Encouragement to Experiment:
- Push Your Limits: Encourage yourself to experiment with different materials, complex designs, and new techniques. Each project is an opportunity to learn and improve.
- Share Your Work: Engage with the community by sharing your projects and experiences. Feedback and collaboration are invaluable for growth and innovation.
Call to Action:
- Continue Learning: Keep exploring and practicing. The world of laser cutting is dynamic, with new technologies and techniques developing all the time.
- Connect and Collaborate: Join forums, attend workshops, and connect with other enthusiasts. The collective wisdom of a community can propel your work to new heights.
Thank you for following along with this guide. Whether you’re a hobbyist looking to start your first project or a professional refining your craft, the skills you’ve developed here will serve you well in all your creative endeavors. Don’t hesitate to revisit any section of this guide as you work on your projects, and remember, the key to mastery is continuous practice and innovation.
Feel free to leave comments or questions, and share your laser cutting successes and challenges. Happy cutting!
